Welcome to this blog post that covers the fundamental steps for installing Google Tag Manager on your website, specifically with considerations for new small or medium businesses in the UK. While the topic may seem very basic & old, there are nuances worth exploring. In this post, I’ll walk you through various methods to set up Google Tag Manager on your website, shedding some light on the advantages and drawbacks of each approach.
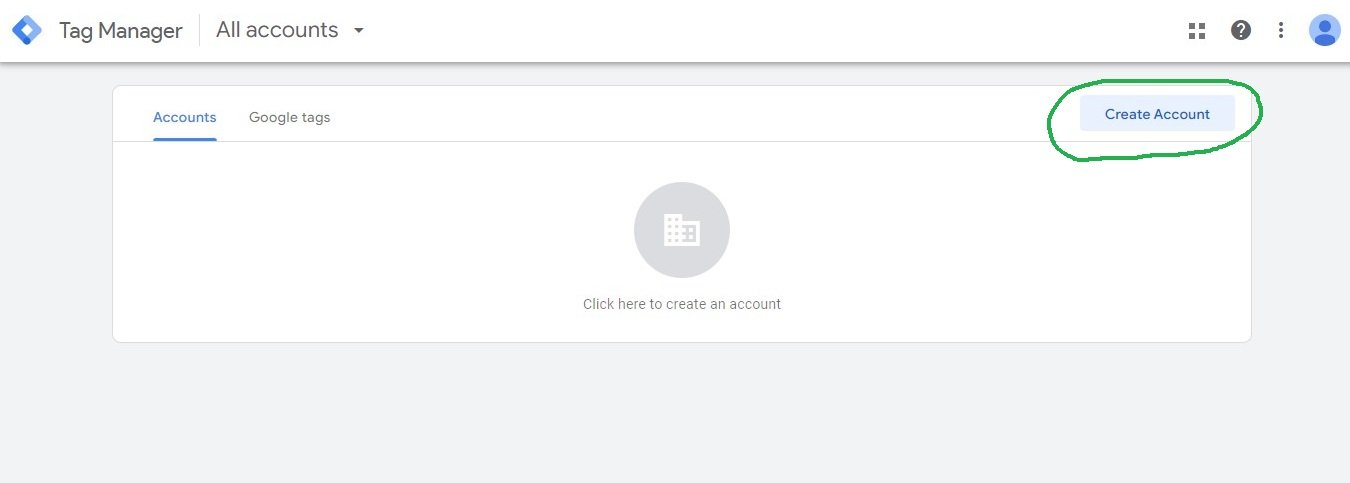
If you’re yet to take this step, the first thing to do is to create a Google Tag Manager account and set up a container. This foundational step is very crucial for effective website management and tracking.
How to Create a Google Tag Manager Account?
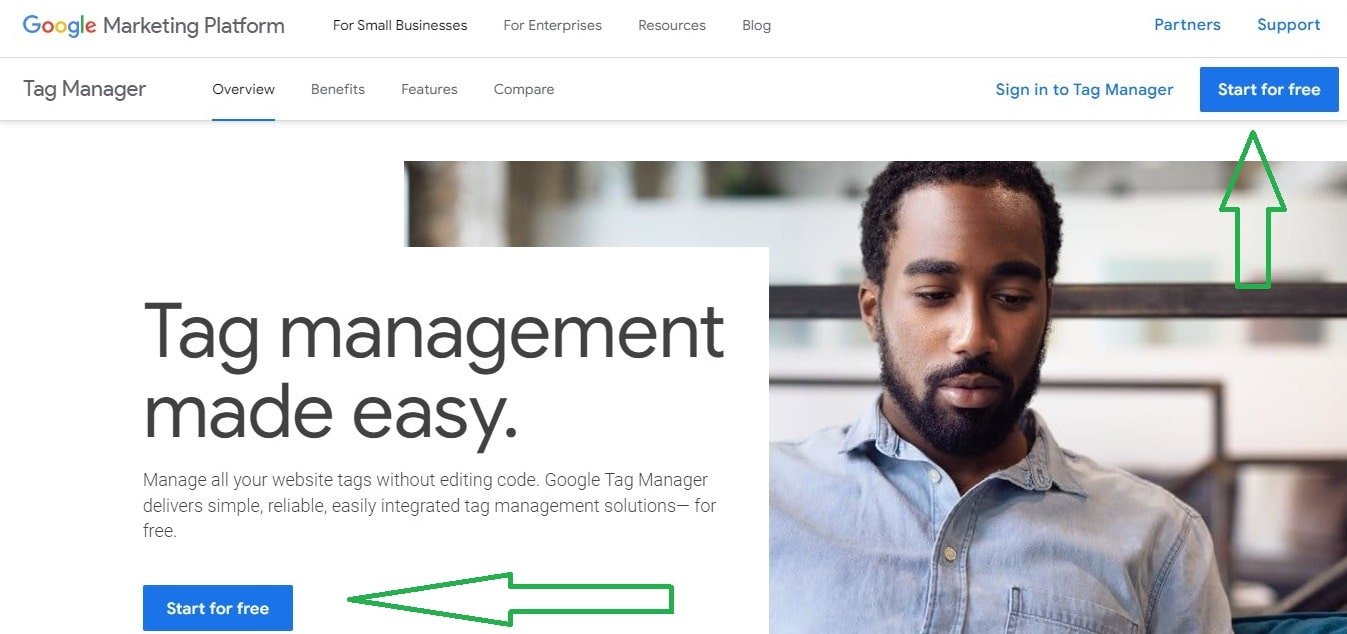
Let’s get started, first, You should create a GTM account. So, go to the Google Tag Manager’s official website and click any two of the main call-to-action (Start for Free) to create a new Google Tag Manager account.
It is very simple, if you already have logged in to your Gmail account, you will be automatically logged in to Google Tag Manager. You can also create a separate account or use a separate account to do it. Here I am automatically logged in
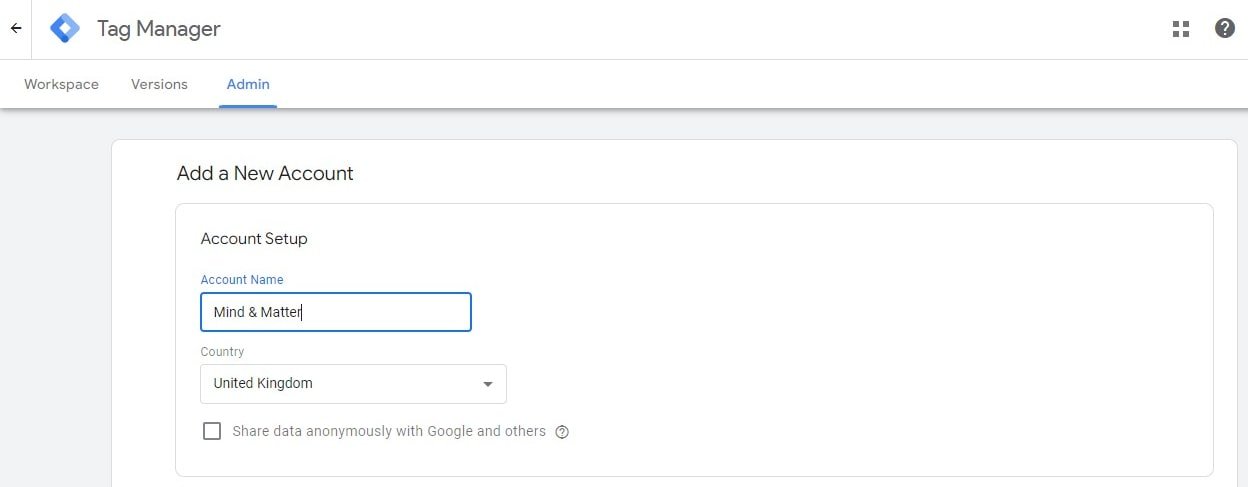
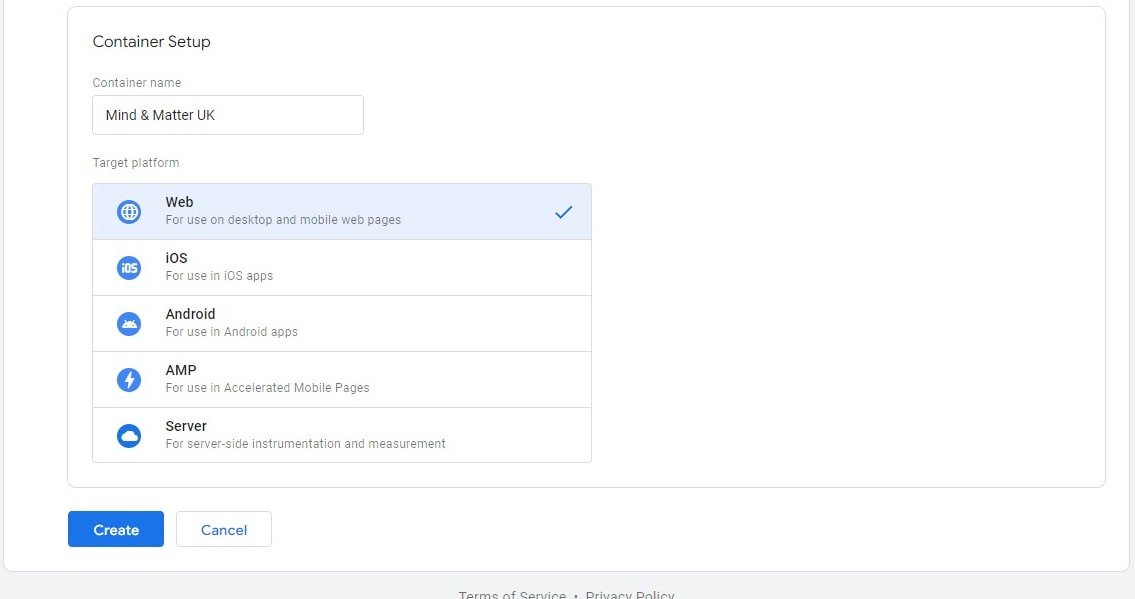
Once you log in, you just need to create a new Google Tag Manager account and a new container, like below. Remember, in Tag Manager, there 5 different target platforms, I am here creating it for my website, so I am choosing the web option.
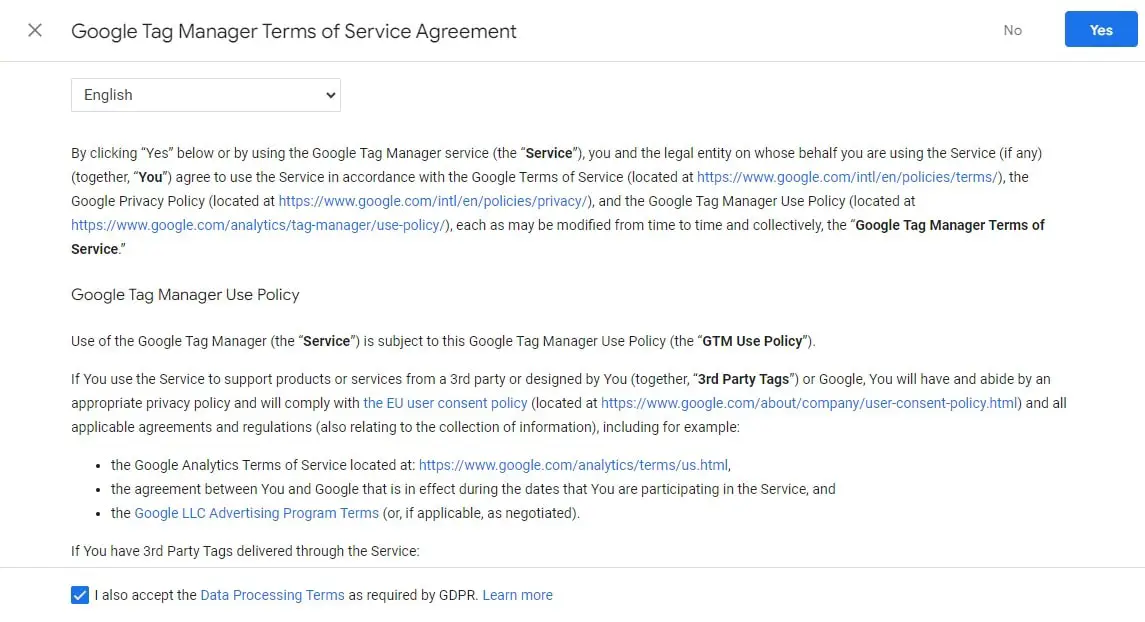
**Also you can agree or disagree with the Google Tag Manager Terms of Service Agreement, here I am saying Yes.
A Google Tag Manager account functions similarly to a Google Analytics account. Typically, it’s associated with a company, business, or client, while a container is typically linked to a website or application. Within a single container, you have the flexibility to include numerous tags, triggers, and variables, streamlining the management of your online assets.
In instances where multiple websites belong to a single business, and their structures and tracking implementations are quite similar, you have the option to utilize a single container across these various websites. This approach simplifies the tracking process and ensures consistency across the online presence of the business.
How do I find my Google Tag Manager ID?
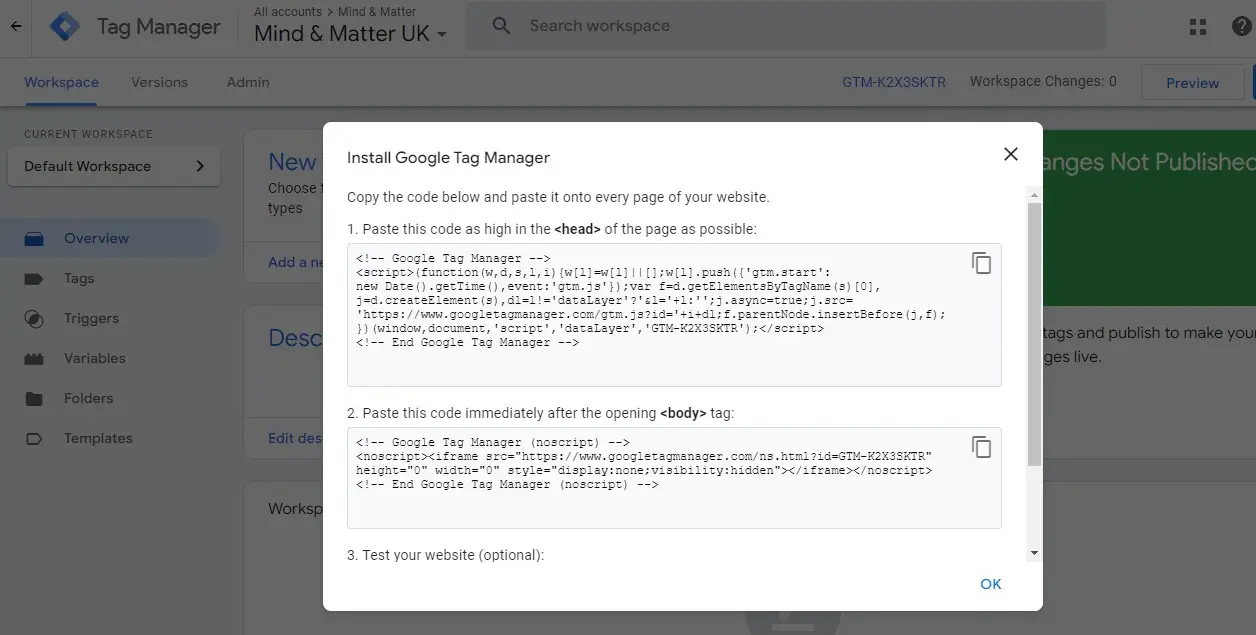
Don’t worry, Google Tag Manager provides the exact code and instructions on how to install the Google Tag Manager code on your website and the code snippets that you must add., whenever you’re creating an account.
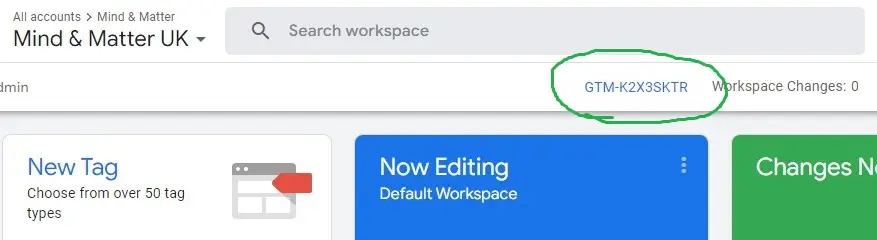
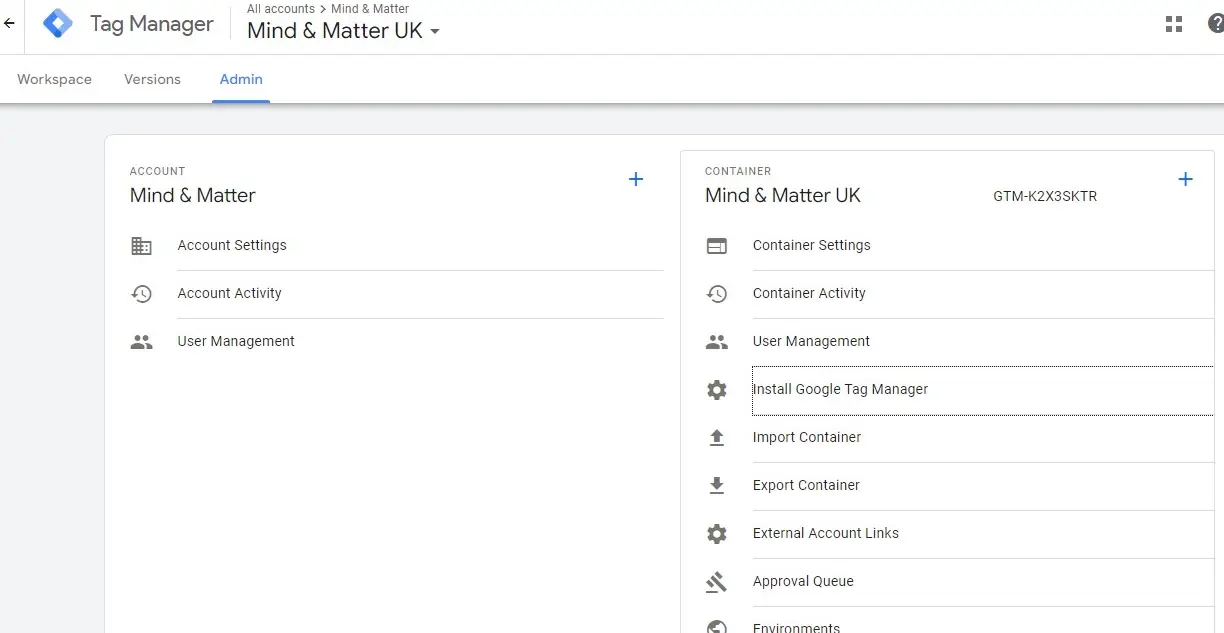
There are two more places where you can find your code, instantly.
1. By clicking the container ID located just above the Now Editing
2. By going to Admin, you can find in the container “Install Google Tag Manager”
So any of these 3 options will open instructions for doing it.
How to add Google Tag Manager code to the website?
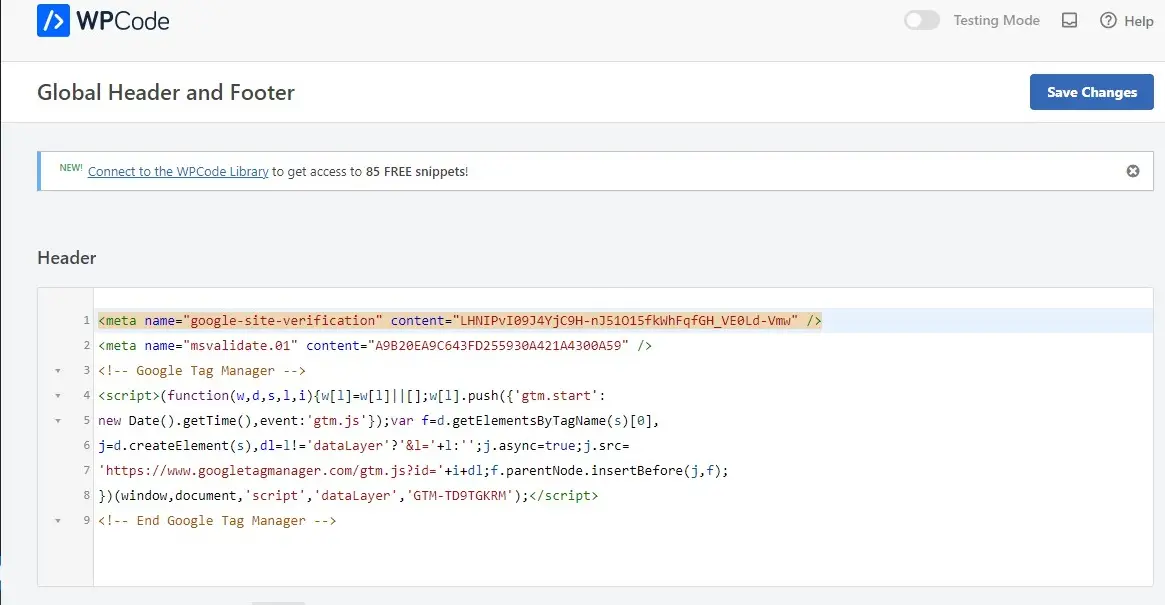
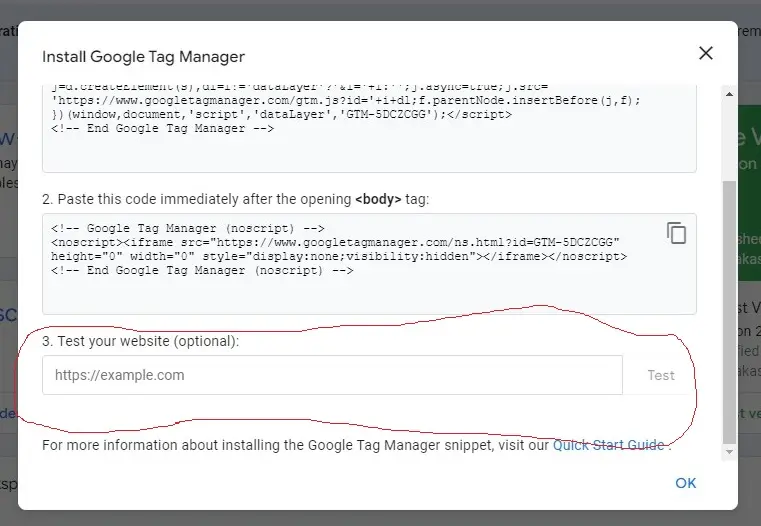
Follow my instructions to install the Google Tag Manager code on your website. You should place the primary code, enclosed by <script> tags, within the <head> tags of your website. This code is very crucial as it enables your page to asynchronously load your Google Tag Manager container, allowing the rest of the page to continue loading while Google processes its functions.
Here’s an example of where you should insert the Google Tag Manager <script> code within the <head> section of your website. We are using WordPress as CMS, so we installed WPCode Lite Plugin.
To serve as a backup and track users without Javascript, add the second Google Tag Manager code (NoScript) in <body> section. The <noscript> tag instructs the browser to render an iframe version of the Google Tag Manager Container if the user hasn’t enabled JavaScript.
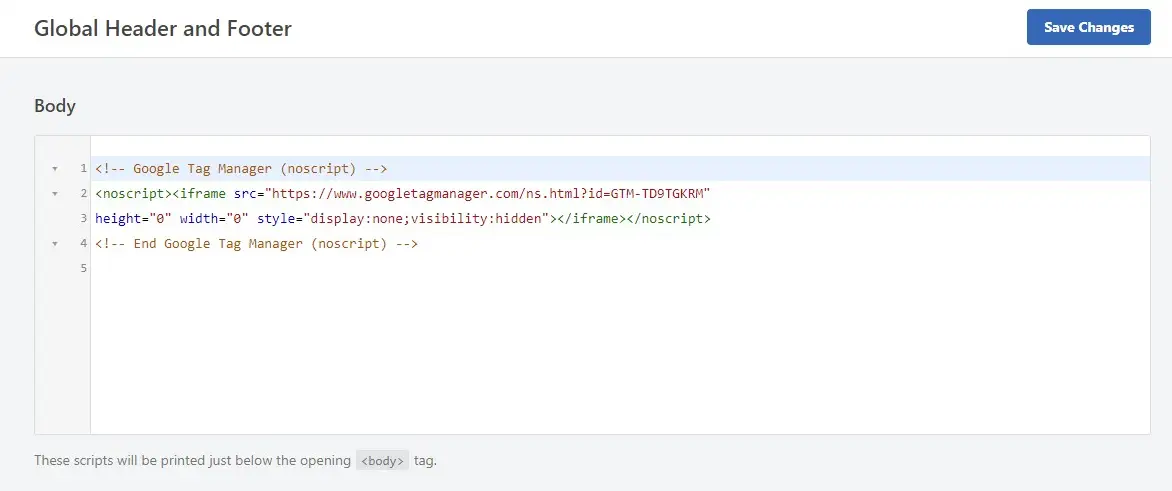
It’s crucial not to place both codes in the <head> section. While you can add both in the <body>, embedding them both in the <head> is not allowed. The <noscript> part generates an iframe, which is invalid within the <head> and would result in invalid HTML for your website.
Consider these options:
- Add the <script> code to the <head> and <noscript> to the <body> (Highly Recommended).
- Add both the <script> and <noscript> codes to the <body> (Not Recommended).
It’s important to note that the <noscript> portion of the Google Tag Manager code is not mandatory. You only need it if you wish to track visitors without enabled JavaScript (which represents a small fraction of web traffic with certain limitations) or if you want to verify ownership of a Google Search Console Property.
Why You Should Place Google Tag Manager Main Code in <head>?
Placing the Google Tag Manager code in the <head> section of your website is highly recommended. The main reason for this recommendation is to optimize your website’s tracking efficiency.
By positioning the <script> part of the Google Tag Manager (GTM) code in the <head>, the snippet is loaded higher up in the page, resulting in faster initiation. In earlier versions of Google Tag Manager, it was suggested to place the snippet in the <body> tag. However, this approach had the potential drawback of missing users who left the page before the <body> tag loaded, especially on slower pages.
If your website is too heavy (For example e-commerce website) and takes more than a few seconds to load, placing the Google Tag Manager code in the <body> might lead to delays. On the other hand, inserting it in the <head> allows for quicker initiation, increasing the likelihood of capturing proper visitor behaviour data.
This setup enables you to track a more comprehensive percentage of traffic, including those users who might bounce before the entire page loads. By gaining insights into the behaviour of these early departing visitors, you can enhance your understanding of user engagement and potentially improve your website’s performance.
What are the GTM Plugins Available?
You can check for the availability of Google Tag Manager (GTM) plugins based on your Content Management System (CMS) to simplify the installation process. Many popular CMS platforms offer plugins that can automatically install GTM for you, requiring only the addition of your Google Tag Manager container ID. If you’re using WordPress, already mentioned above. If you using Magento or Zoomla also provides several GTM plugins that you can explore.
In Shopify either you can find a GTM plugin or you can directly install in theme.liquid file. Additionally, on some platforms, like WIX, You need to add your ID from your Google Tag Manager account to your Wix account in Marketing Integrations. Using a plugin is always an easy option, but if you want to add it manually, you can share instructions with your web development agency or team.
How to Check if Google Tag Manager is Working?
After the GTM code is implemented on your website, you have to make sure that it is properly installed. There are many options you can choose from:
- Right-click on your website -> choose View page source or you can just load your website and press Ctrl + U on your keyboard and find that container code.
- You can open Google Tag Assistant to check or You can add it to Your browser as an extension to check.
- Also after installing you can check it from tag manager like below;
Final Words from Me on Google Tag Manager:
The recommended approach for installing the Google Tag Manager code is straightforward: adhere to Google’s provided instructions.
It’s crucial to note that the placement of the Google Tag Manager code directly influences the timing of tag firing. Placing the code lower in the hierarchy will result in delayed tag activation, potentially leading to data loss.
If your website runs on a popular content management system like ours on WordPress, consider exploring ready-made plugins that facilitate the effortless installation of Google Tag Manager with just a few clicks. Also, you can hire an expert SEO agency in the UK to help you out, if you have enough budget.